page
pageWelcome to my page
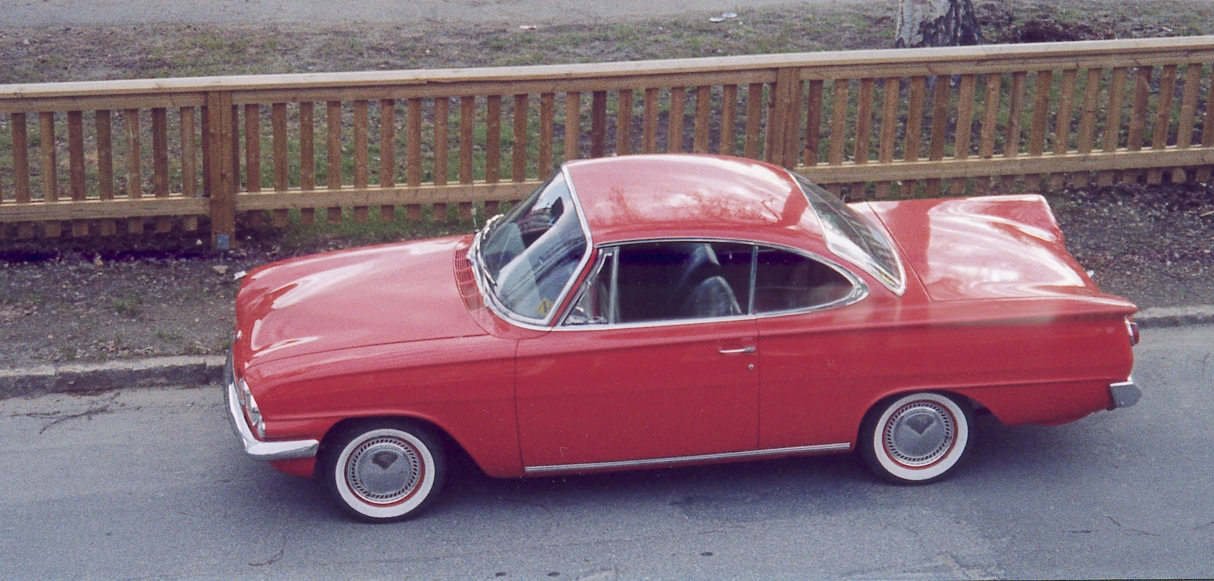
Well here are some pictures of my Consul Capri from 1962 and the pictures are taken in 1997
|
|
|
|
First from the front and then |
From the rear |
|
|
|
|
|
This is how my Capri looked during restoration in the summer of 1981 |
In the garage |
Out from the garage, and outside my brothers Taunus GXL |
|
|
|
|
And like this in 1983 newly painted and assembled |
1983 In the sandpit |
1985 Outside the garage in Mobacken |
|
|
|
|
|
1990 outside the workshop in Myckle |
1998 in Skelleftehamn outside my apartement |
2007 Finally got the Capri to Stockholm/Norrtälje after me moving down in 1998 |
|
|
|
|
|
2008 In Storage again, this time in Hallonbergen |
2011 Ground down by my friend Kent awaiting new paint wihout cracking |
2011 |
|
|
|
|
|
2012 Home again from paint, outside the new house |
2012 In front of what will become my Garage/workshop |
2014 in front of the side of the Garage/Workshop |
|
|
|
|
|
2015 Outside the Garage/Workshop |
2015 inside the Garage/Workshop |
2016 Troublesome rear brakes dissasembled |
|
|
|
|
|
2016 Brake shields ready for paint |
2016 Brake shields rust protected and painted and then mounted together with the driveshaft |
2016 Brake adjuster renovated and mounted |
|
|
|
|
|
2016 The stuff ordered from england |
2016 New wheel cylinder mounted but handbrake parts just cleaned and lubricated |
2016 Brake shoes mounted |
|
|
|
|
|
2016 And finnaly the drum in place and the rear brakes are as good as new again |
2016 Parking in the sun with new weather strips and renovated rear brakes |
2017 Rear engine balk cleaned, rust protected and painted - ready to be mounted |
|
|
|
|
2017 Engine lifted from engine compartement |
2017 Engine mounted on stand and ready for dismantling |
2017 Just the struts left |
|
|
|
|
2017 Track control arm removed and awaiting renovation |
2017 Difficult to remove seal from rear of control arm |
2017 Front beam cleaned, rust protected and painted - ready to be mounted |
|
|
|
|
2017 Painted extractor |
2017 Engine almost disasssmbled |
2017 Track control arms renovated |
|
|
|
|
2017 Gearbox on bench and awaiting cleaning and fixing |
2017 Engine back from renovation firm painted FORD green and ready to be assembled |
2017 Gearbox overhauled and painted in Ford Green |
|
|
|
|
2017 Getting there, 3 out of 4 |
2017 Main parts mounted and starting to look nice |
2017 Other side and loks nice with extractor pipes mounted |
|
|
|
|
|
2017 Inlet also! |
2017 Looks so nice that i almost don't want to put it in the car |
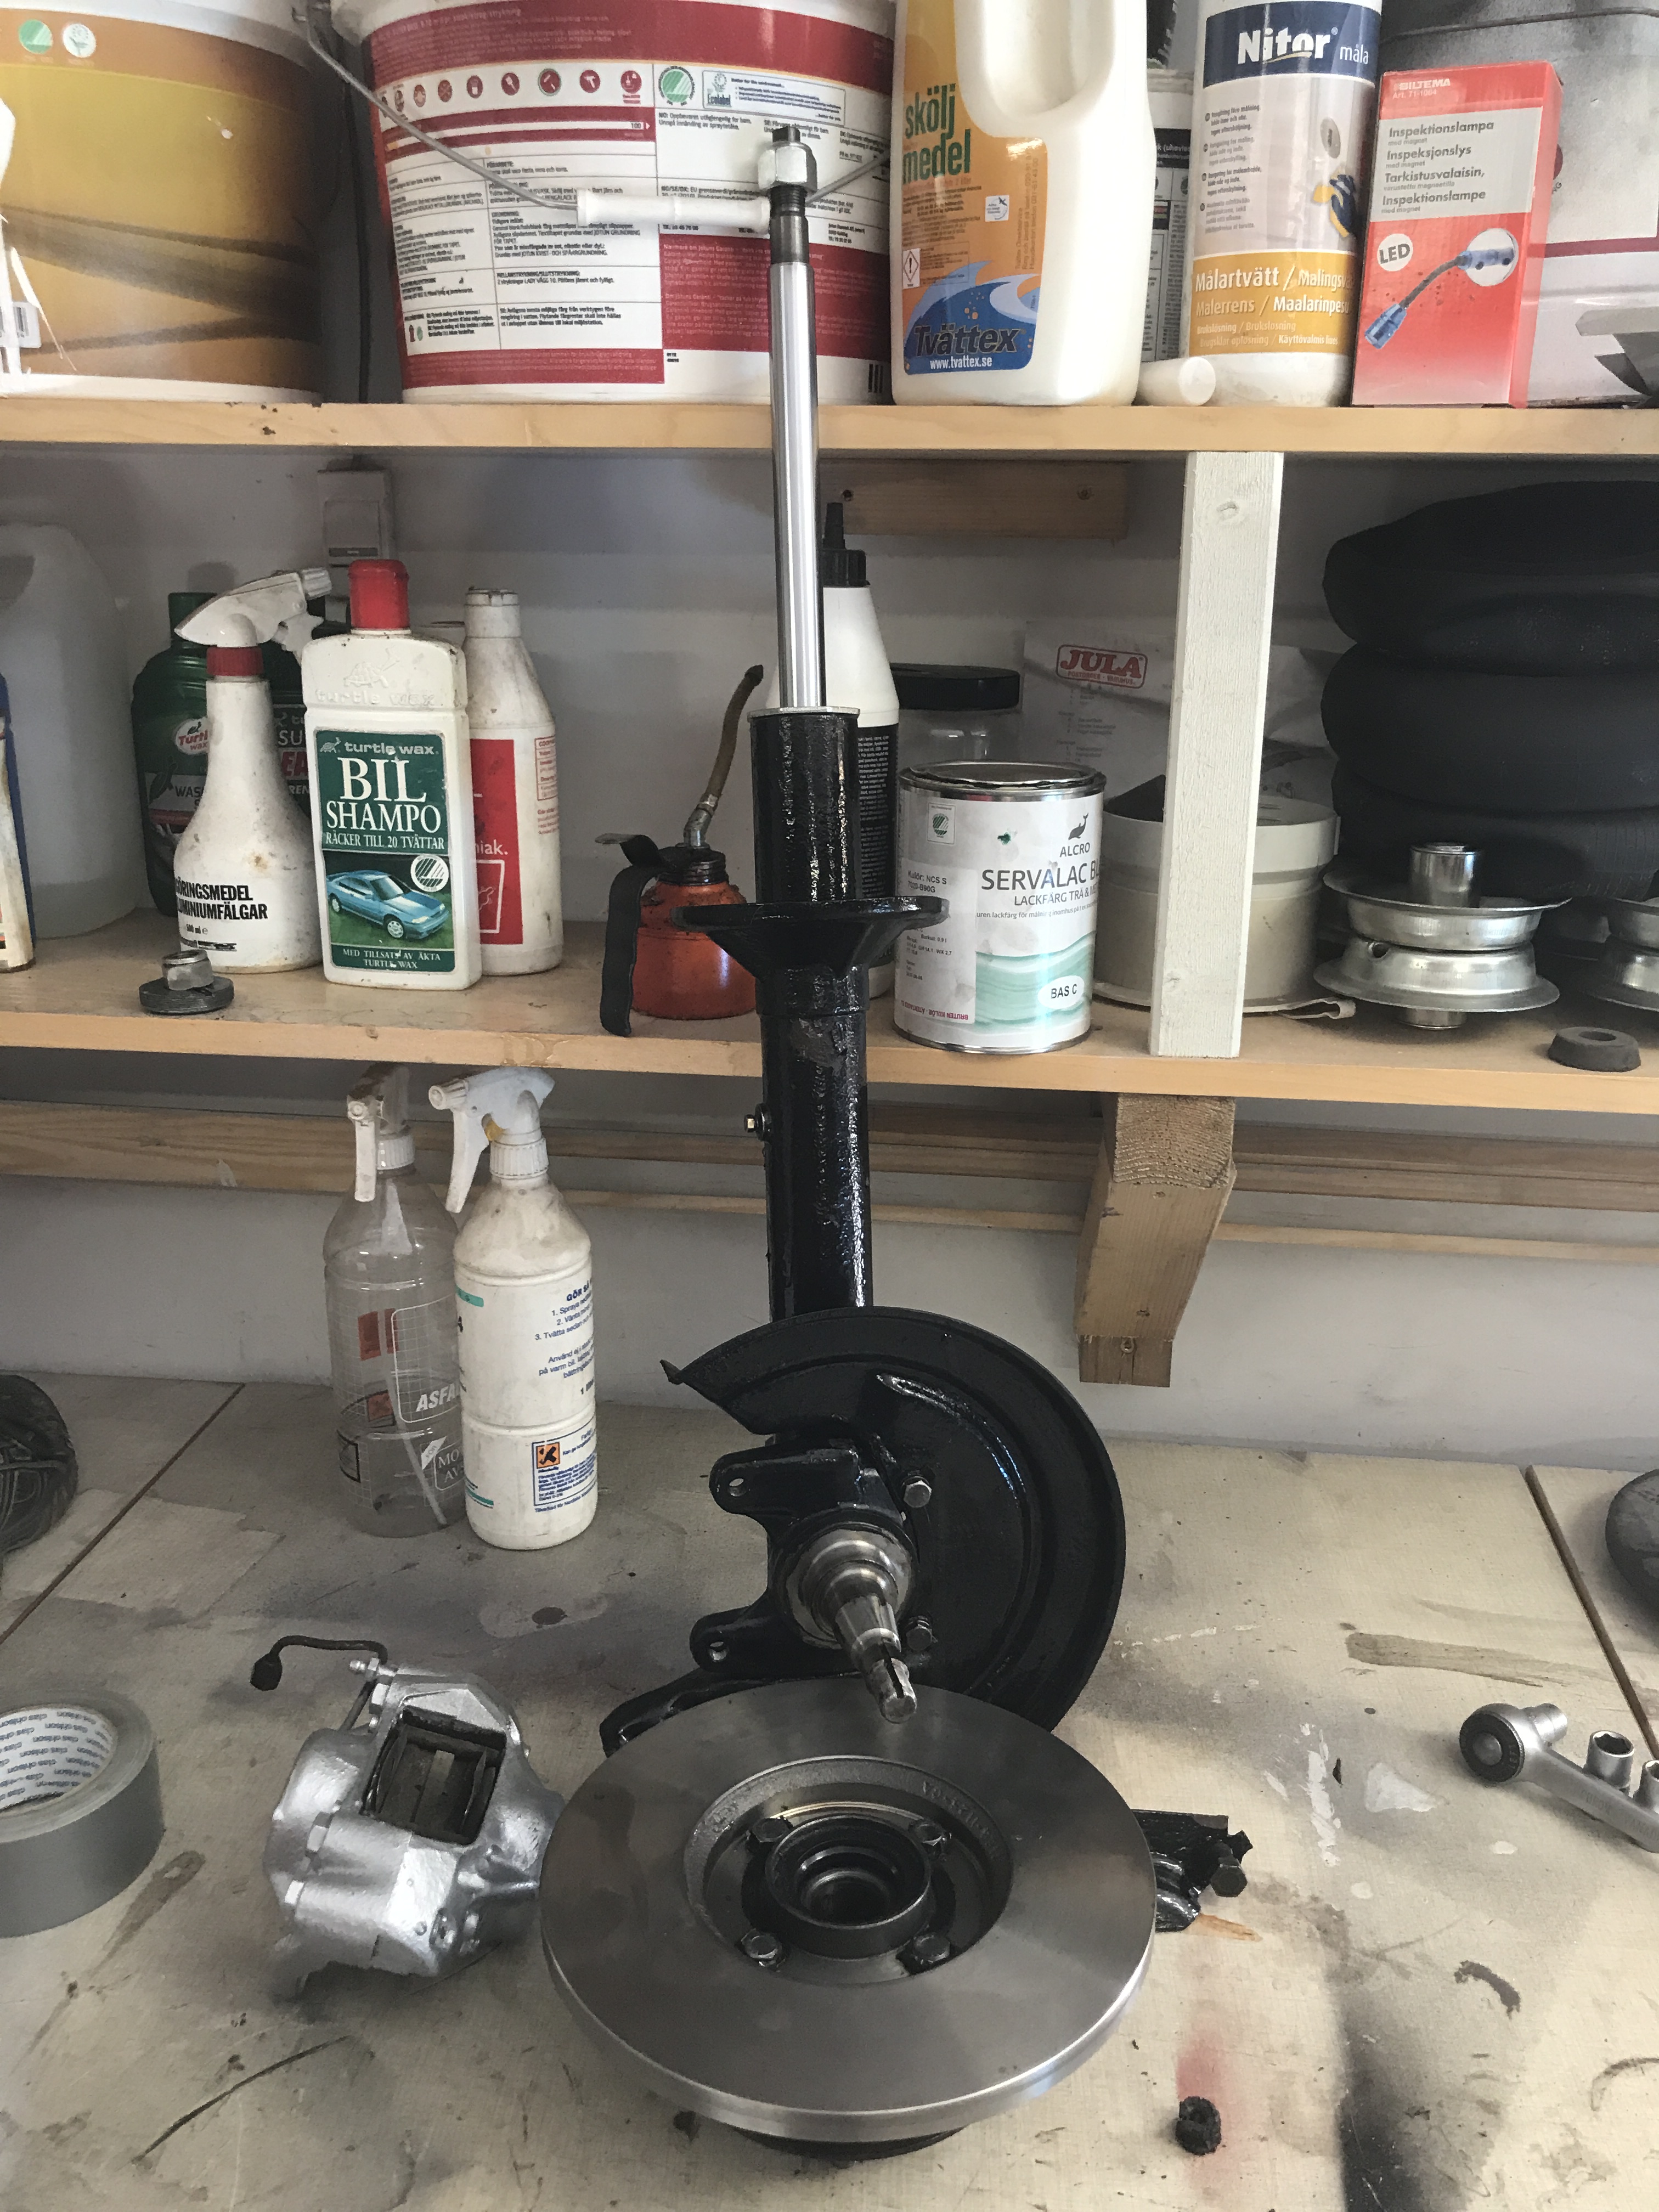
2017 Suspension strut in wize, just mounted new gas inserts from Biltema, fitted good with a 21mm distance at bottom |
|
|
|
|
|
2017 Brake shield mounted, disk and caliper awating to be mounted |
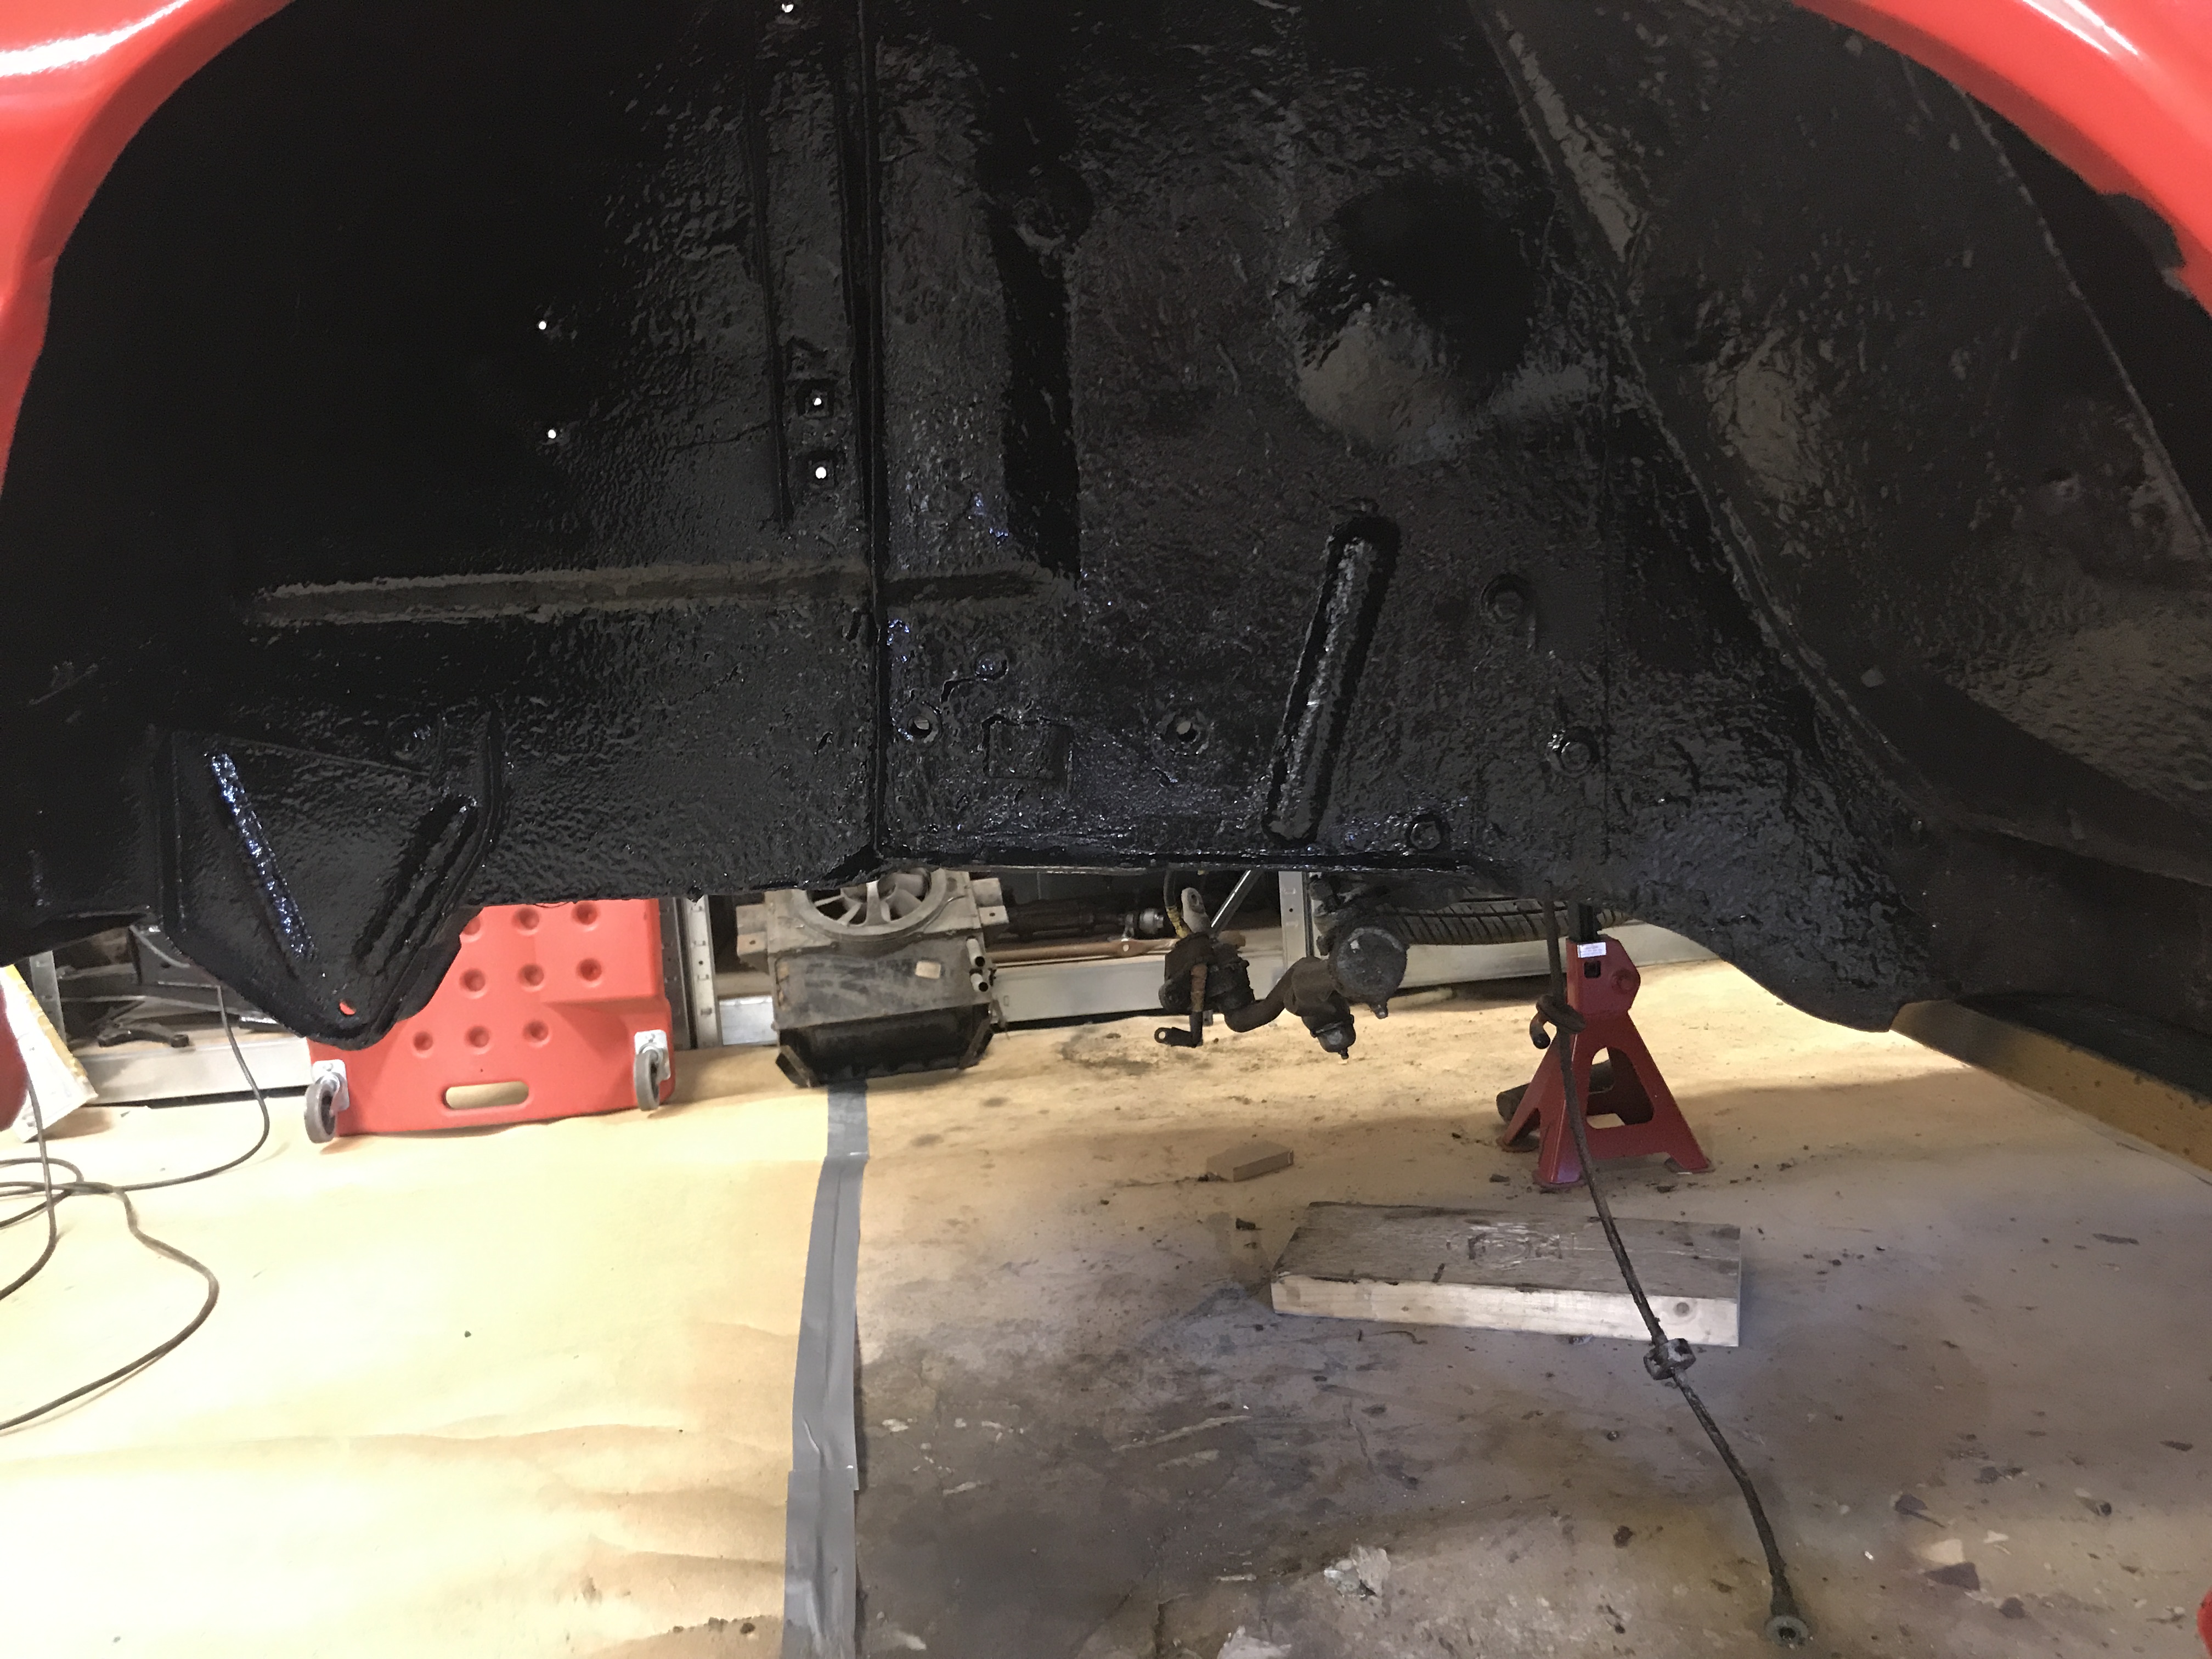
2017 Inner wing rust protected with linseed oil and then underseal on top to protect against wear and to keep the oil in place |
2017 Drive shaft rubber to prevent durt to shock absorber upper mount in strut |
|
|
|
|
|
2017 Left strut mounted in wing |
2017 E-rim just testing to se how it looks |
2017 Renovated Engine is being refitted to the engine bay |
|
|
|
|
|
2017 Engine almost in place |
2017 Engine in place and some bits mounted ... |
2017 Electric cables mounted in inner wing with relay box to relieve the electrical system |
|
|
|
|
|
2017 Cooler cleaned and repainted |
2017 The outer heater in place after renovating seals |
2017 Speakers mounted in doors, intended to be invisible behind new door sides |
|
|
|
|
|
2017 Fuel tank removed and some of the rust and dirt grinded away awaiting som rust protection |
2017 Fuel tank rust protected and painted, ready to be mounted |
2017 Upper padded instrumetpad mounted inside and it looks nicer. Aux instrumets next |
|
|
|
|
|
2017 Floor of boot rust damaged during winter parking outside a few years ago. Boot mat just rubbish so i will put in a new one once the rust has been sorted out |
2017 The rustiest parts have been cut away, so they will be sorted out first then the floor pan on the right, no rust holes there but it is in bad shape |
2017 The cut out parts that i will try to make fresh copies of, so time to try out my sheet metal knowledge |
|
|
|
|
|
2018-01 First part to be fixed in the boot floor. The shortest part cut, bent and welded in. |
2018-01 Small part between filler and right cut out welded in and the discovered that the boot floor is very thin around here so more steel to be replaced |
2018-01 Part of the floor welded in and just some smal bits missing on that side |
|
|
|
|
|
2018-01 Second lane of sheet metal bent and welded in. Just the last part left now and the floor will be ok |
2018-01 Finished welding the boot floor now. Added some rust protection to everything |
2018-01 Some red ground paint added to the floor and it starts to look alright |
|
|
|
|
|
2018-01 The rust damaged part of the spare wheel carrier has been cut out, so now just the problem of making a new one |
2018-01 New spare wheel carrier besid the old one. Not the same but will do |
2018-01 Spare wheel carrier spot welded to the car and looks good for now |
|
|
|
|
|
2018-01 New dials instead of the originals which are broken |
2018-02 The new dials installed in the car with warning light for oil pressure added |
2018-02 Fuel tank mounted underneath, rust protected and painted and then more protection |
|
|
|
|
|
2018-02 Fuel tank front mounting |
2018-03 New stainless steel front indicators to replace my old damaged ones |
2018-03 Electric fan mounted on radiator, maybe to remove the blade form the water pump later |
|
|
|
|
|
2018-03 Left front door vent sealing changed. Had to remove almost everything in the door to get this out but now it is done, so now the same procedure on the other side |
2018-05 Rims finally ready for some new tires |
2018-06 Engine and gearbox testmounted with newgrinded flywheel and new clutch |
|
|
|
|
|
2018-06 Exhaust manifold mounted on engine |
2018-06 inlet manifold and carburettor there as well |
2018-06 Vacuum meter hose attached and outlet for servo blinded since servo didn't fit due to alternator |
|
|
|
|
|
2018-06 So fiesta thermostate lid with fan contact and the Original steel fan removed so now i need to find a hose that fits to the radiator |
2018-06 Just passed Swedish MOT so now it is just the rest to do but in essence I can now roam the roads in the capri :-) And the 1600E wheels just looks awsome on the car i think |
2018-06 Finally found the time to cut the mat from Biltema to suit the luggage compartment. It looks rather fine i think myself |
|
|
|
|
|
2018-06 Looks really nice with 1600E wheels and new nokian tyres |
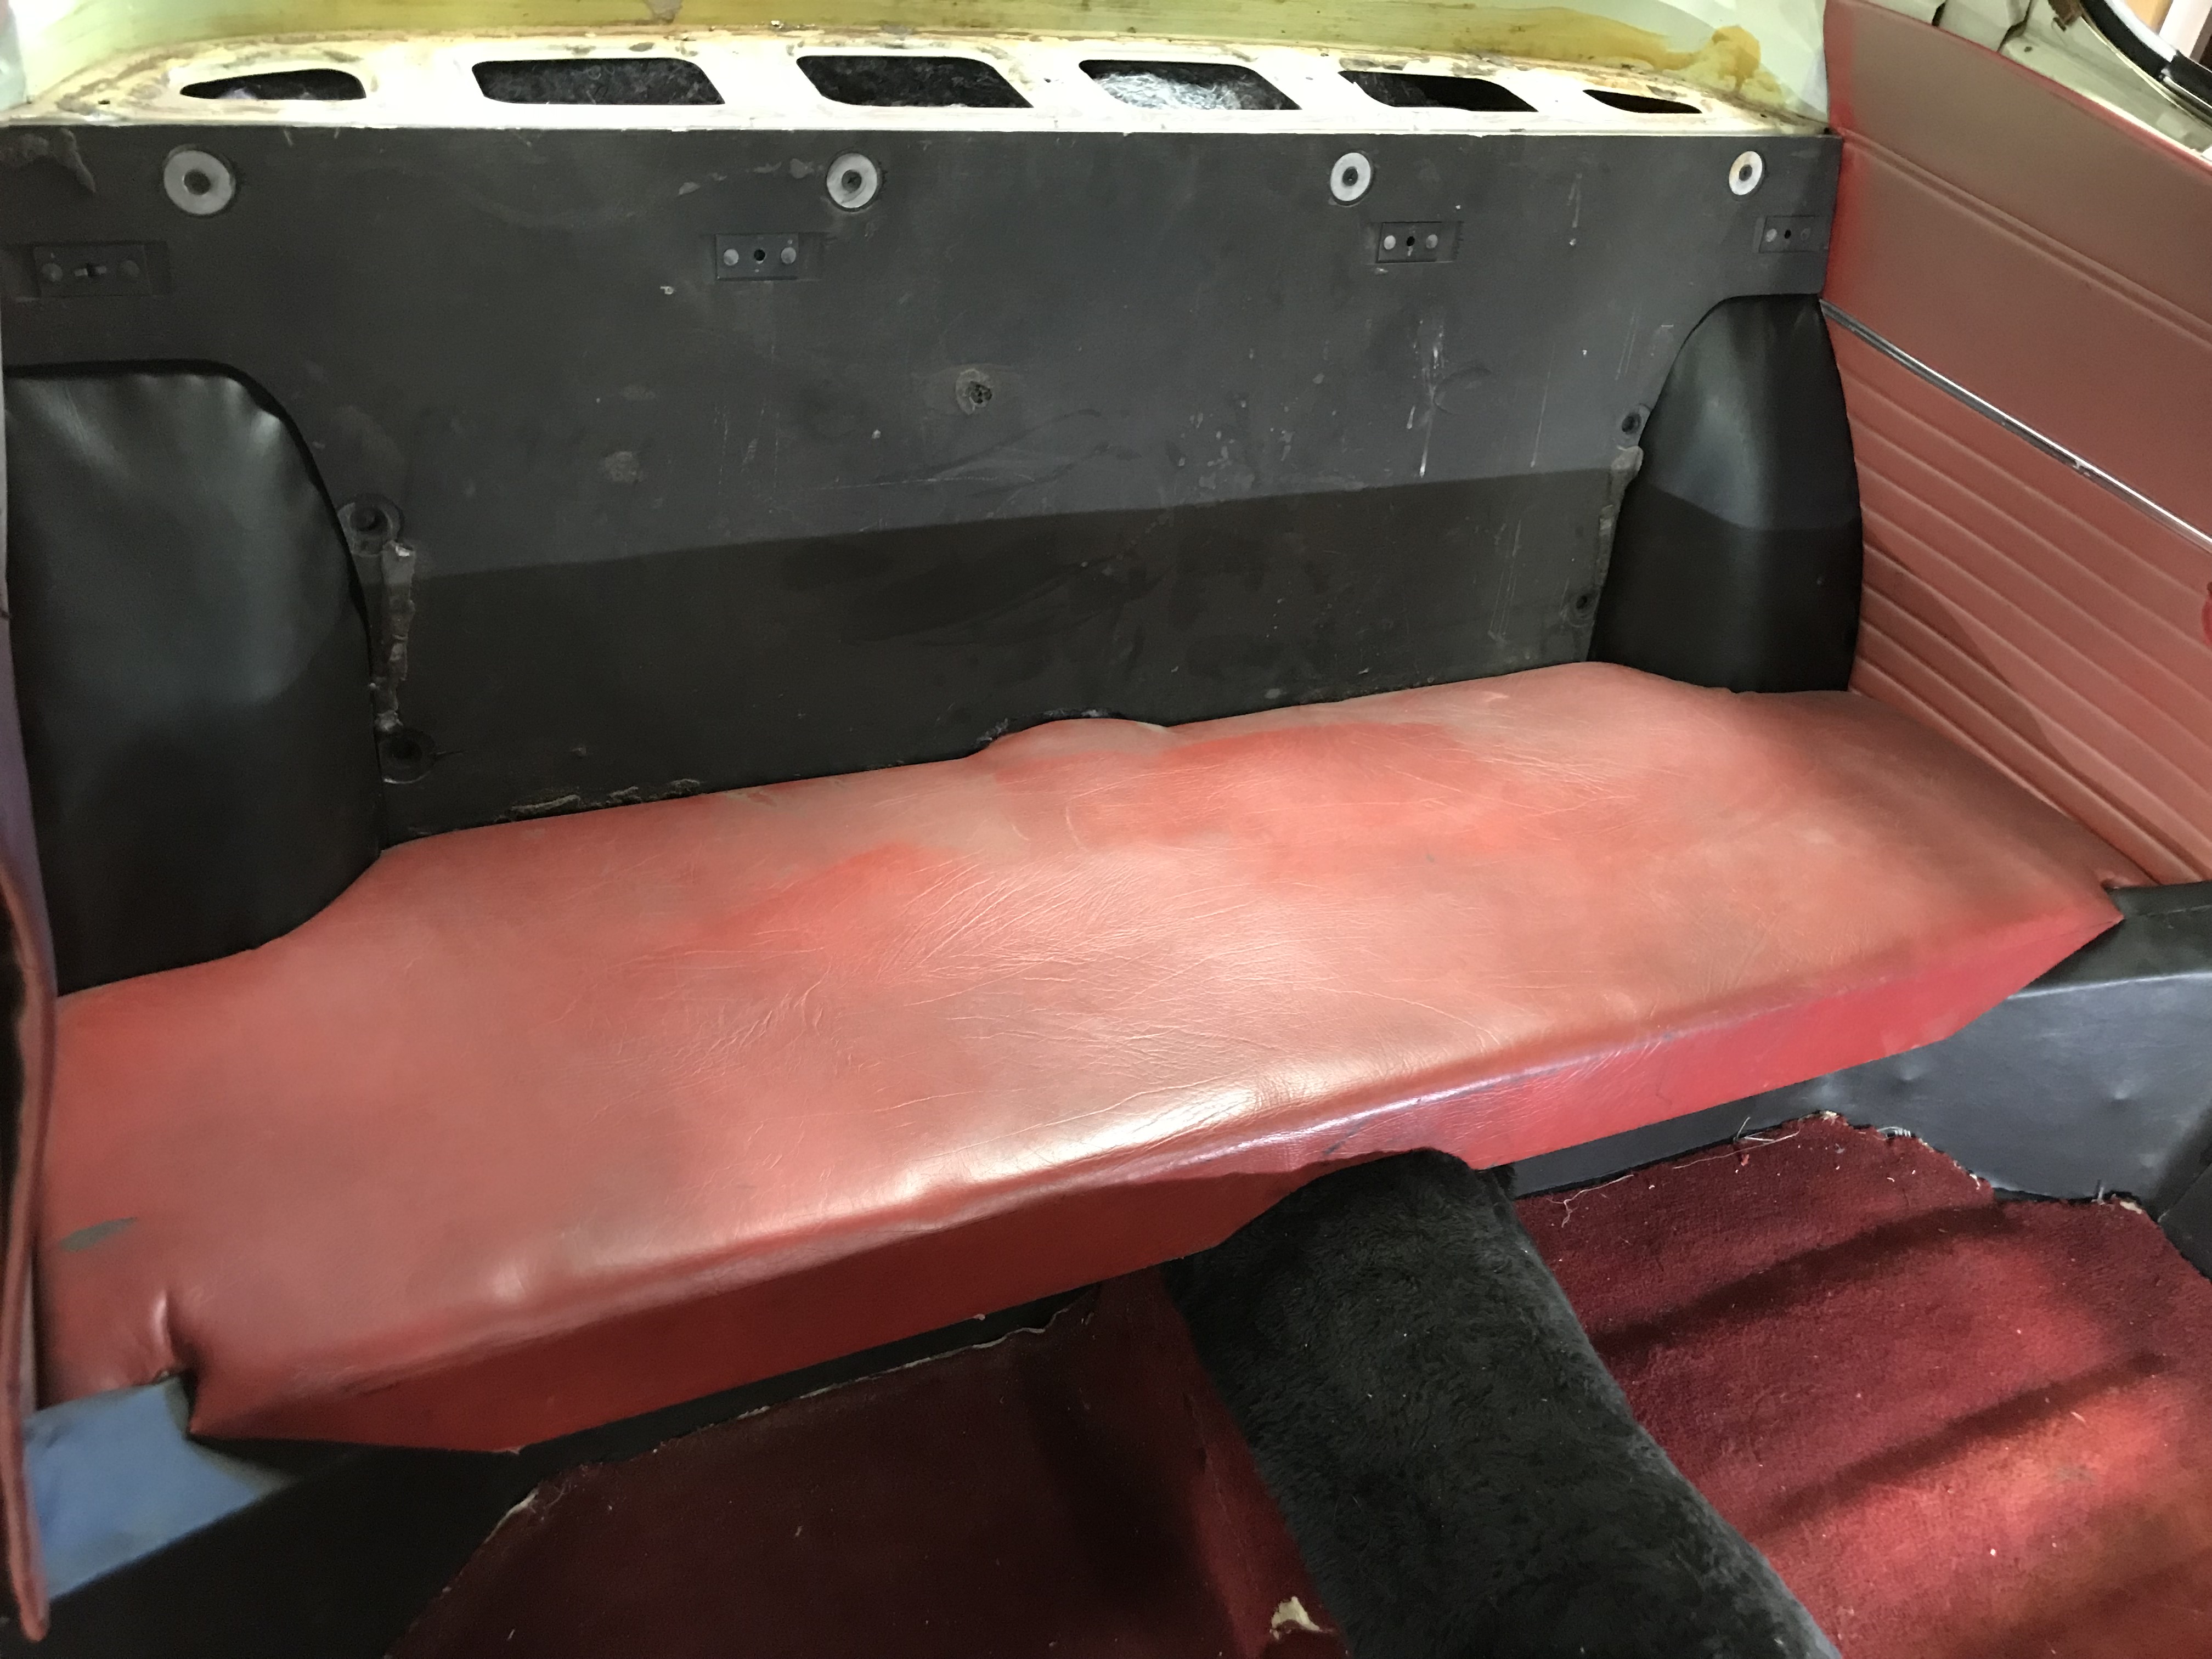
2018-07 So fixing rear seat and sorrounding awaiting finances to order new from Aldridge trim |
2018-07 Trying again to mount the front emblem and it's holder |
|
|
|
|
|
2018-07 Rear emblem needs replacing, and maybe there will be available at the club in the future |
2018-07 Tried on some nice auxiliary lights |
2018-08 restoring the rear lights and indicators |
|
|
|
|
|
2018-09 Got my keyring today |
2018-09 The top mounts does not look to good with that crack, so i have hade the opportunity to order som new from the club |
2018-09 The new top mounts, will change them this winter |
|
|
|
|
|
2018-11 So the new stainless steel exhaust system beside the car before fitting |
2018-11 Exhaust system mounted but the original holders broke so i used rubber mounts from a more modern Ford and it sits very well under the car now |
2018-11 The new top mounting and the 50+ year old with cracks in it |
|
|
||
|
2018-11 Newly washed outside the garage |
||
|
|
|
|
|
2019-01 Received som well needed rubber lists that i will mount this winter so the Capri will be quieter next summer, some other nice to have bits also came :-) |
2019-02 Making a bottom part for the battery box, to be mounted in the luggage compartment |
2019-03 A new rear bumper mounted and polished. Maybe not new but at least NOS |
|
|
|
|
|
2019-06 New external mirrors, i hope that i will be able to mount them on the car someday :-) |
2019-07 Interior at present but new interior parts have been ordered from aldriddge trim in England |
2019-07 Investigating the shape of the front outriggers and it seems like i have to make a new pair of them |
|
|
|
|
|
2019-07 View from underneath |
2019-07 I do like the rear of the car and when i have mounted new bumper and a new exhaust i looks just so much better, Exhaust in stainless steel just makes it even nicer |
2019-08 Front suspension parts restored, never know when they are needed |
|
|
|
|
|
2019-08 Gear stick restored now with the circular ball which makes shifting so much nicer. |
2019-08 Speed shift restored, Cortina speedshift in the background |
2019-08 Just a nice view |
|
|
|
|
|
2019-08 New gaskets and oil seals for the gearbox just arrived from ebay |
2019-09 Hole drilled a bit bigger to accomodate power switch |
2019-09 Power switch mounted |
|
|
|
|
|
2019-09 View of power switch with key inserted |
2019-09 Battery box installed with breaker and 150A fuse, just the rest to be drawn, but that will be done when installing new carpet from aldridge. |
2019-09 Both 16mm2 and 35mm2 cables attached to the plus side of the battery |
|
|
|
|
|
2019-09 Connections behind the switch |
2019-09 End of the 16mm2 cable, distribution plate instead of the battery |
2019-09 So the 35mm2 cable directly to the starter and the 16mm2 cable to the "rest" |
|
|
|
|
|
2019-09 New black carpet from aldridge in place |
2019-09 The rear is getting there. Door side and backrest in place |
2019-09 Door sides in place |
|
|
|
|
|
2019-09 Rear seat at last finished the bas so tha pads could be mounted |
2019-09 Interior is getting better and better |
2019-09 Looks nice |
|
|
|
|
|
2019-09 New rubber at the rear of the hood (Didn't have any before) |
2019-10 Outrigger and other stuff just came from England and the club |
2019-11 New interior finished, really a lift |
|
|
|
|
|
2019-11 Oh dear, look i found some rust in the outrigger |
2019-11 Evidence of bad repair of the outrigger earlier. Parts of the old outrigger can be found underneath. |
2019-11 Rusty Outrigger cut away and with part of the main beam also |
|
|
|
|
|
2019-11 Main beam repaired and rust protected |
2019-11 New outrigger adapted and welded on the jacking point |
2019-11 New outrigger welded in, rust protected and a new wear bearing consisting of base material |
|
|
|
|
|
2019-12 Other side not in such a good condition either, in need of a replacement |
2019-12 Lots of dirt inside here also |
2019-12 Rusty outrigger removed and the remaining steel in need of some repair |
|
|
|
|
|
2020-01 The new interior bits look really nice in the car |
2020-02 Extractor pipe painted silver to match the stainless steel exhaust system |
2020-02 Neck support fits really nice on the seats |
|
|
|
|
|
2020-04 New improved coller fittet with electric sensor for electric fan mounted. |
2020-04 Pipe for receiving engine breathing mounted under air filter |
2020-04 engine breathing filter replaced by angle to lead fumes to catch tank |
|
|
|
|
|
2020-04 Catch tank to catch the crank case emissions before leding to air filter |
2020-09 Rear springs removed to be sent to Rånäs Springs to be strengthened |
2020-12 New hig moment starter engine beside standard starter engine |
|
|
|
|
|
2020-12 Upgraded springs and beam primed |
2020-12 Upgrade springs |
2020-12 Other side of springs primed |
|
|
|
|
|
2020-12 And a black rust protecting layer |
2020-12 More in level with strengthened springs |
2020-12 The capri's place in the Garage |
|
|
|
|
|
2020-12 Bright parking lights with LED |
2020-12 Also bright LED lights at the rear |
|
|
|
|
|
|
2021-01 Rear suspension beam almost finished |
2021-07 A vist south of town |
2021-11 Stainless steel manifold ready to be mounted after some corrections |
|
|
|
|
|
2021-11 Stainless steel manifold mounted |
2021-09 New front spring and old |
2021-09 Good for mounting with this big key for the shock absorber |
|
|
|
|
|
2022-01 Rear axle suspension |
2022-01 Rear axle suspension |
2022-01 Rear axle suspension |
|
|
|
|
|
2022-04 Sanding and polishing |
2022-04 Sanding and polishing |
2022-04 Sanding and polishing |
|
|
|
|
|
2022-07 The looks after sanding and polishing |
2022-07 Gearbox housing replaced after not being able to solve oil leakage |
2022-07 First run after gearbox housing change and car polish |
|
|
|
|
|
2022-07 Rear view from the same trip |
2022-09 Early morning run, last one for this year |
2022-09 Early morning run, last one for this year |
|
|
|
|
|
2022-10 Tucked in for the winter |
2022-11 First time the Ford oval on the wing during my time |
2022-11 Ford oval on the wing |
|
|
|
|
|
2023-01 Extra fuel tank repaired an painted with biltemas rust protection |
2023-01 Extra fuel tank painted with zink protective paint |
2023-01 Extra fuel tank painted with white paint |
|
|
|
|
|
2023-01 Extra fuel tank painted with last layer in black |
2023-01 Rusty part of rear jack beam removed |
2023-01 Crack in jacking point on the right side |
|
|
|
|
|
2023-01 New 3mm steal ready for welding |
2023-01 Beam repaired and welded and ready for jacking point |
2023-01 Jacking point welded in place |
|
|
|
|
|
2023-01 Jacking pont on other side welded in |
2023-01 Nothing yet |
2023-01 Nothing yet |